The log
Choose a hole and its columns on the left; the log draws on the right, every column on the same depth scale, with a legend under it for every column.
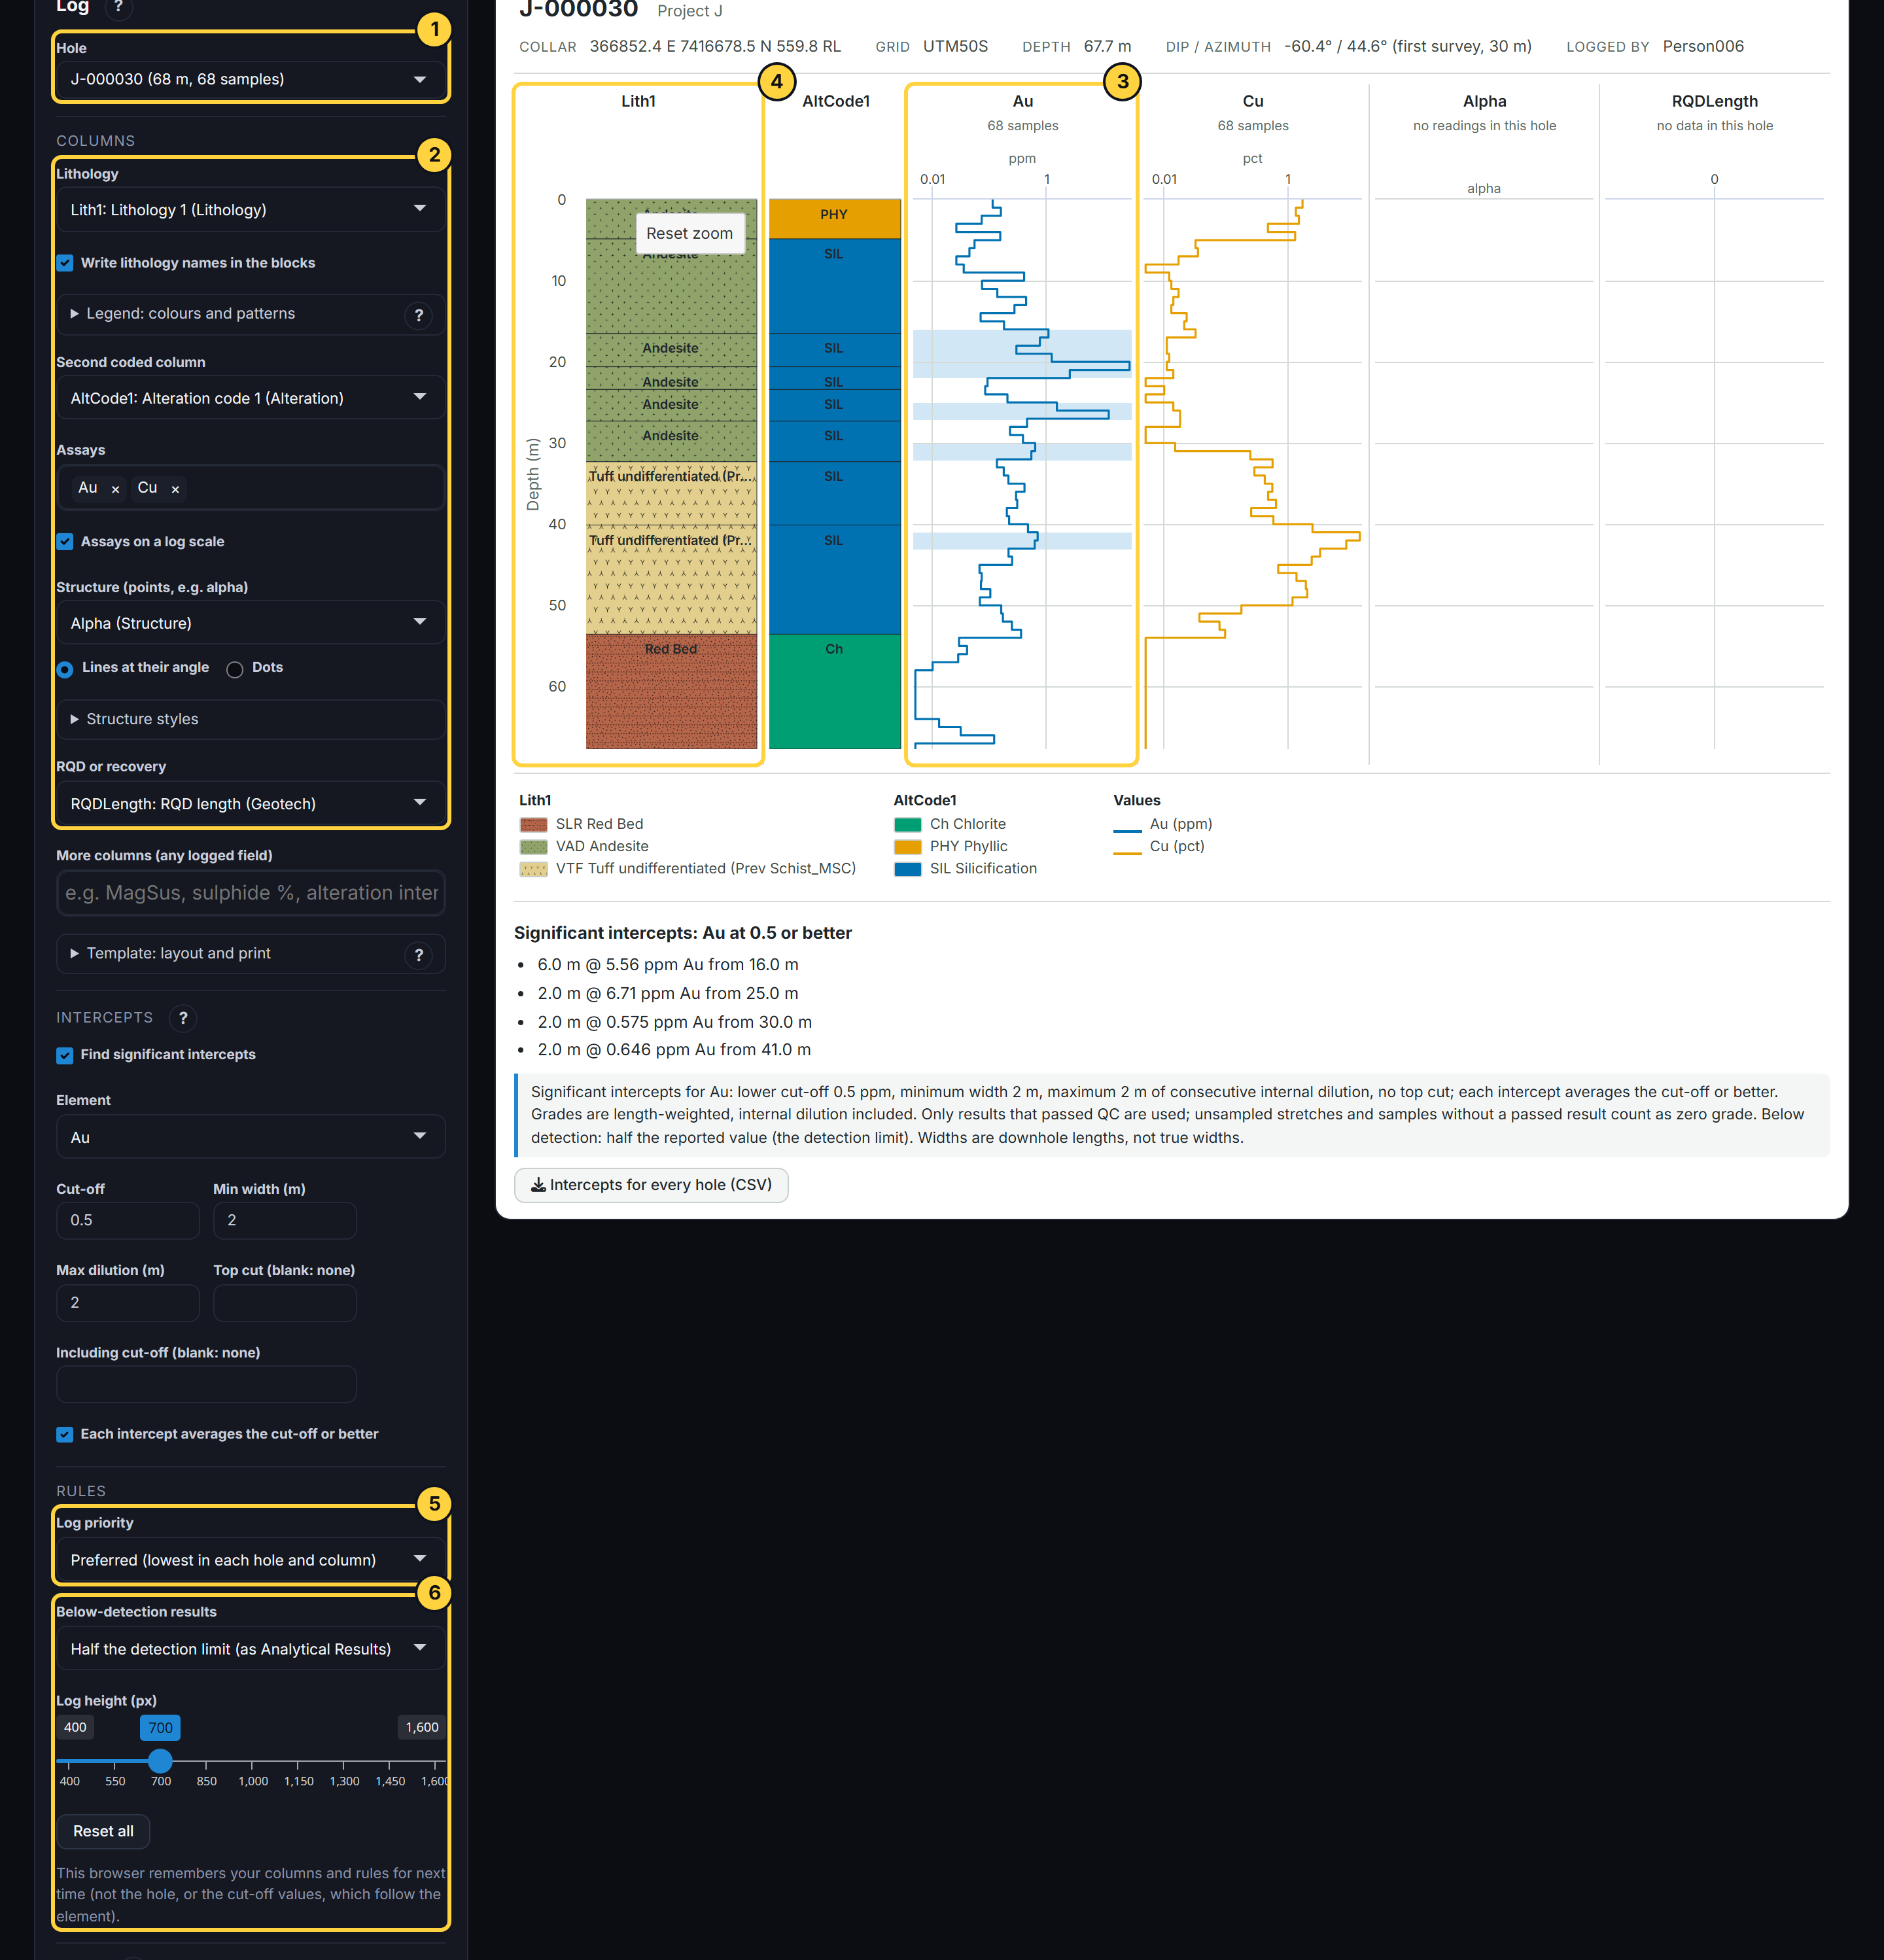
- Hole: The holes with the most samples come first. The header above the log gives the collar, grid, depth, first survey and who logged it.
- Columns: Lithology (with its colours and FGDC patterns, and its names written in the blocks or just the codes), a second coded column such as alteration, any assays, structures (lines at their angle, leaning by beta, or dots) and RQD or recovery. More columns adds any other logged field: MagSus, sulphide %, an intensity (drawn on a None to Intense colour ramp) … Choose (none) to leave one out.
- Assays: Each sample shows the result that passed QC (PRIORITY 1), from the site’s preferred method (lowest rank), latest load first. Intervals whose only results are pending (amber) or failed (red) QC are shaded.
- Zoom: Drag up or down on any column to zoom in: every column follows. Reset zoom, on the first column, brings back the whole hole.
- Log priority: Where a hole was logged more than once, the log shows one logging only: the lowest PRIORITY the hole has (the site’s preferred), never mixed. Choose a priority to see that logging instead; a column without it says so.
- Rules: Below-detection results count at half the detection limit by default, as in Analytical Results, or as written. This browser remembers the settings you change for next time; Reset all puts the defaults back and forgets them.